Cards by Joyce

My grandmother, Joyce Rasmussen, has always been interested in arts and crafts. She has made baskets, pottery, needlework, crochet, knitting, paper-mí¢ché, and origami. What she's really been excelling at recently is making elaborate homemade greeting cards. Ever since getting a personal computer back in the late eighties, she has been fond of printing her own greeting cards, which involves choosing appropriate clipart and writing a nice message. I have always appreciated her cards more because I know that the sentiment comes directly from her, not Hallmark™.
At some point the idea occurred to her that if she cut a perfect circle of just the right radius in the front of the card with an X-Acto knife, then one of her origami chrysanthemums would fit there perfectly and be both held tightly in place and completely cover the hole. This discovery ushered in a Renaissance in Joyce-made greeting cards.

A birthday card of mine from 2009. The little plastic jewel sticker in the center of the flower serves to hold down all the folds.
This is what the card look like on the inside. The flaps already present in the design of this origami flower hold it in place. No glue necessary.

This card was for our second wedding anniversary. The origami flower trick works perfectly on top of flowery clipart.
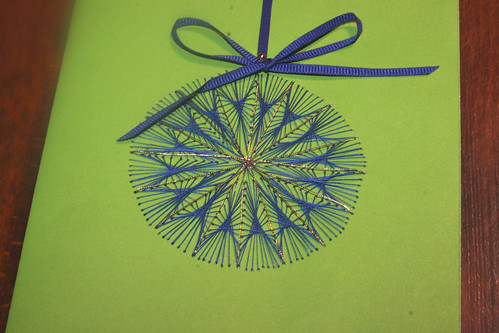
Just this month I've seen a brand new technique for greeting card decoration, one that I would never have come up with: sewing. If your card stock is strong enough, why not poke holes in it with a needle and pull some thread through? What could you create with this technique? Just about anything, actually...

This is Marga's birthday card she opened yesterday. How did she do that? Curious, I peeled back the white paper perfectly pasted in the inside to cover the back of the sewing.
Wow! A perfect circle of holes, with radial lines of holes, and then an awful lot of clever sewing, with loose threads held neatly in place with tape. Amazing!

This past Thanksgiving, Marga specifically requested a Christmas card with the Three Wise Men on it, since they play a more central role in Spanish Christmas. The result, using silver thread, was beautifully elegant.
By far the most creative card I've seen from my grandmother was for our third wedding anniversary this year. It was a 3D popup card made from one of our wedding photos. I'm fairly familiar with how to make what are called "virtual 3D photos". I've been meaning to play around with the technique sometime. Here's a great tutorial on it. The trick is to cut out an object in the foreground and then somehow fill in the background behind it by guessing what it probably looked like. Usually this involves using the Photoshop clone tool or copying some other similar part of the background and pasting it in the hole where you cut out the foreground figure. This is pretty easy with Photoshop, particularly with CS5's "content aware" feature.
What really blew my mind was that my grandmother did all this by hand, with actual cutting with scissors and actual pasting with glue. The effect was nearly seamless, and if I hadn't been educated in how this technique is done digitally, I might not have even noticed that it had been done at all, which is about the highest compliment you can give to a special effect. I couldn't take a good photo of the card to demonstrate just how incredibly done it was, so I had to record a video. Check this out!


Update: My grandmother tells me that the inspiration for these cards, with the exception of the 3D popup, came from her daughter, my Aunt Carol. When Carol visited in October of this year, she brought along a book called Sewing on Paper, from which they learned various techniques.

